Preservation tips for your own family memories
A Collections Chronicles Blog
By Elena Abou Mrad, Archives and Special Collections Specialist
April 2, 2026
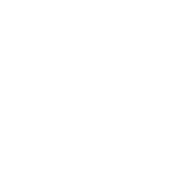
When I tell people that I am an archivist, they often mention that they have boxes of old letters or photographs tucked somewhere in a basement or attic. More times than I can count, the question that follows is: “Where do I even start?” This is totally understandable, as encountering an unprocessed collection can often feel daunting—a gargantuan task that we don’t even want to start tackling due to a lack of time, resources, or energy. However, organizing your family papers and preserving them for future generations is easier than you think. In this blog post, I will show you how I do archival processing and preservation here at the Museum, with some tips and tricks to adapt this process to organizing your own family memories.
The archival project I am currently working on is the Moses Collyer Collection, which was donated to the South Street Seaport Museum in June 2010 by Professor Joseph Perillo.
Perrillo and his wife had bought the Moses Collyer House, now a historic landmark, in Wappinger Falls, New York and had found a trunk and three wine boxes containing “correspondence, logs, and other records as well as photographs.”
Moses W. Collyer (1856–1942) was a riverboat sloop Captain on the Hudson River, who also did lighterage work[1]Lighterage (or lightering) is the maritime process of transferring cargo, such as oil, bulk commodities, or containers, between a large vessel (mother vessel) and a smaller vessel (lighter or … Continue reading within New York City.
[Portrait of Captain Moses Collyer in profile], n.d. Gift of Diane and Joseph Perillo 2010.003.0075
Since it arrived at the Museum in 2010, this collection was inventoried and partially processed by the archivists at the time, who divided the archival materials into series in order to track where they were found (the trunk, and a Tiefenbrunner wine box) and separate them by type (photographs, binders, volumes).
Step 1: Collect Information
Before you even open that box or trunk of your own, it’s helpful to gather some information that will guide you in the archival process. For the Moses Collyer Collection, I had documentation from when the trunk and the papers were acquired, an inventory and a finding aid from the archivists that processed the collection before me, and I also did some research into the history of the Collyer family and of Chelsea, New York (which is now part of the village of Wappinger Falls).
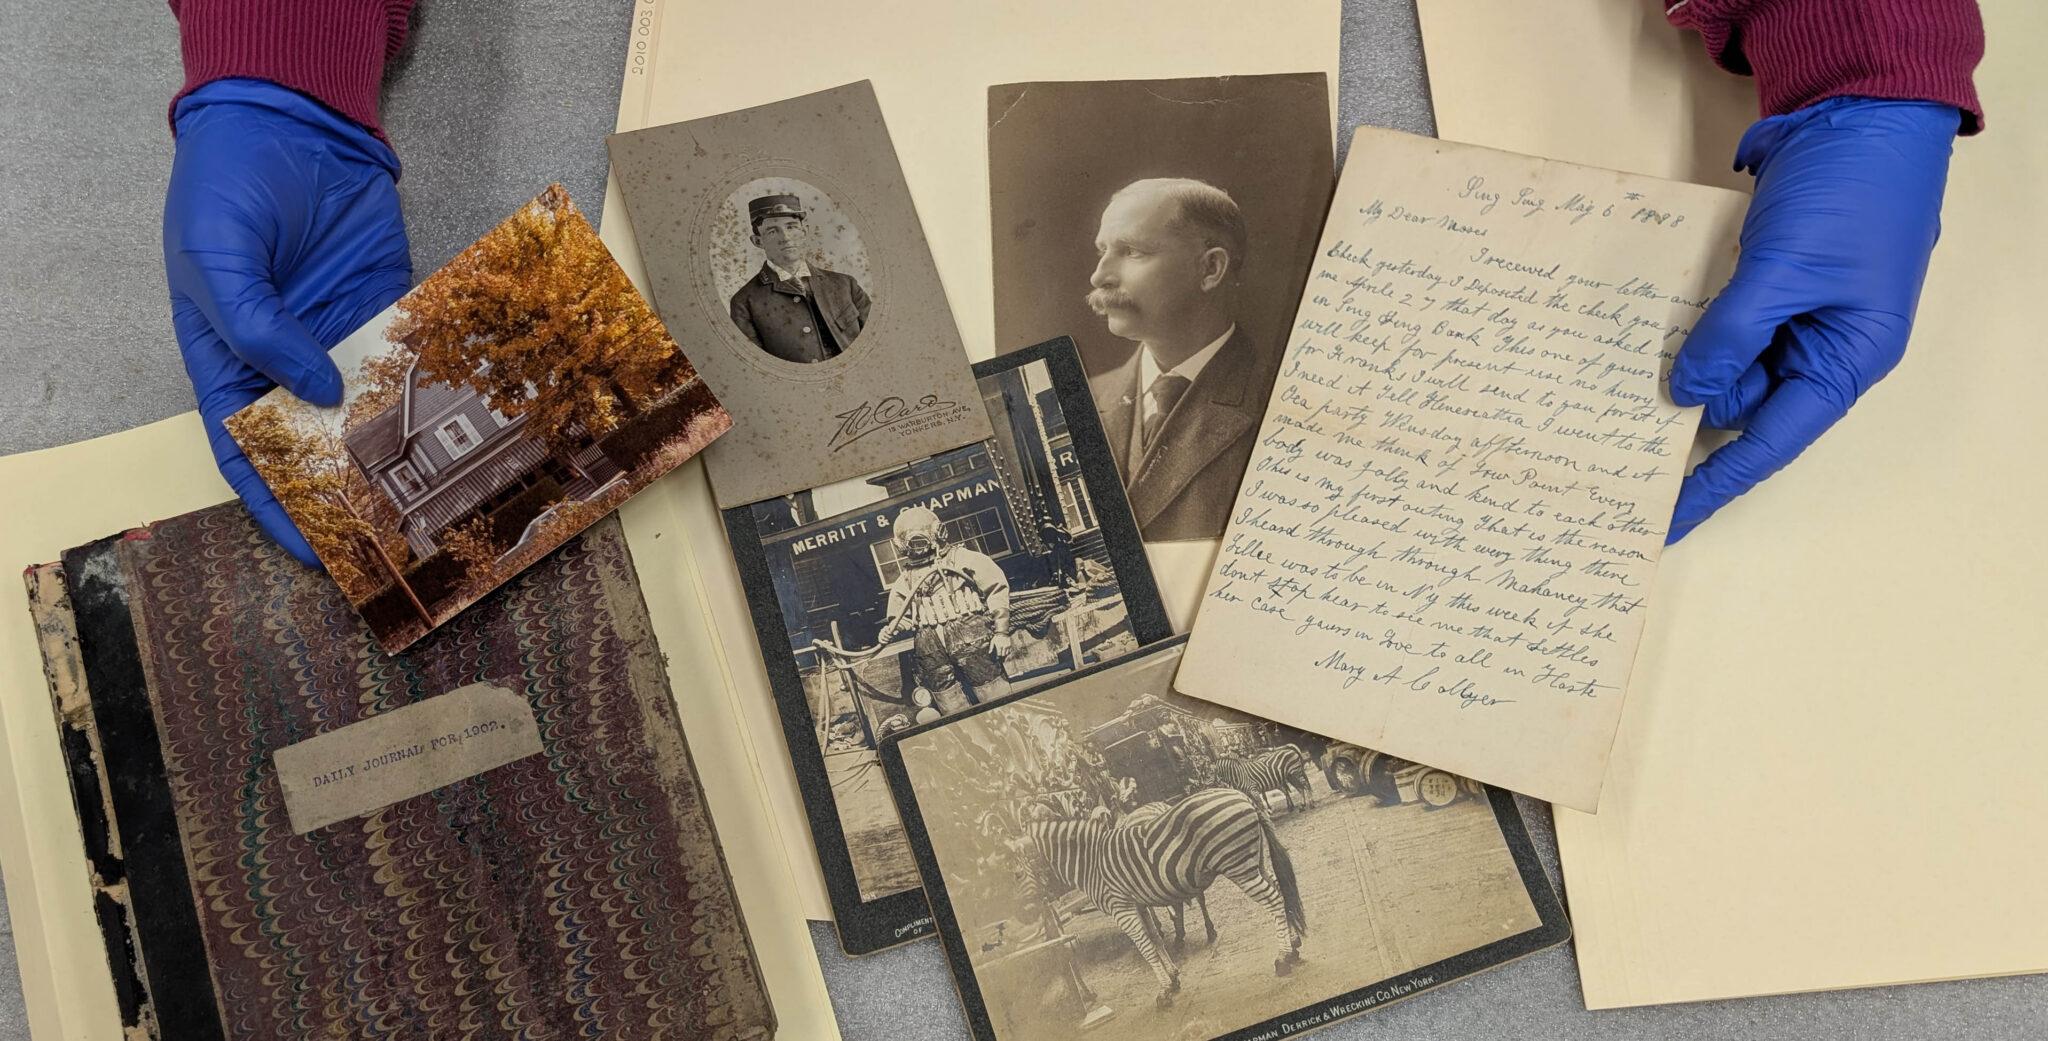
[View of Captain Moses Collyer House in the fall], ca. 1970s–1980s. Gift of Diane and Joseph Perillo 2010.003.0083
For your own archival materials, ask your family members about who collected these papers, how old they are (approximate dates are perfectly fine), and what they know about these materials.
Step 2: Assess the Material Conditions
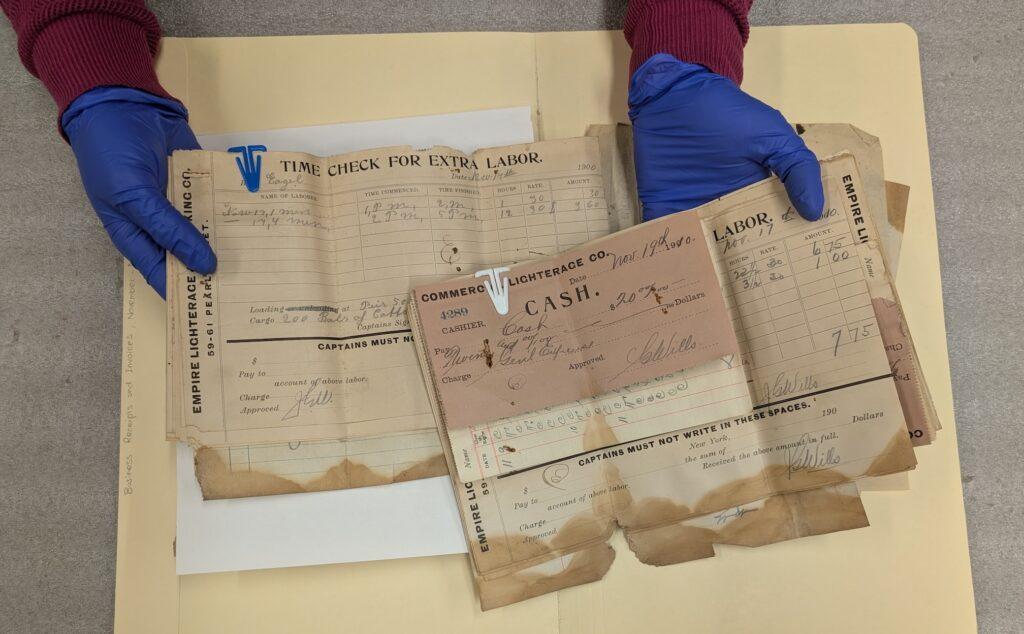
If these archival materials have been untouched for years, there is a chance that they might have deteriorated over time. Make sure you use nitrile gloves while handling everything, not only to prevent damaging the items, but most importantly to ensure your own health and safety. An N95 face mask will also come in handy if you suspect that there might be mold (white or black) on your papers: respiratory illnesses are no joke!
In the case of the Collyer Collection, the Collections Management team was aware that several items were dirty and damaged, but we had not done an assessment to evaluate the presence of mold—which would have been a threat to our health and to other collections in storage. In Fall 2025, we opened the boxes, one by one, and checked their contents for mold. At the end of the process, we established that there was no active mold, just dirt and water damage; moreover, we agreed that the collection needed to be rehoused to prevent shuffling, and to condense the items into fewer boxes.
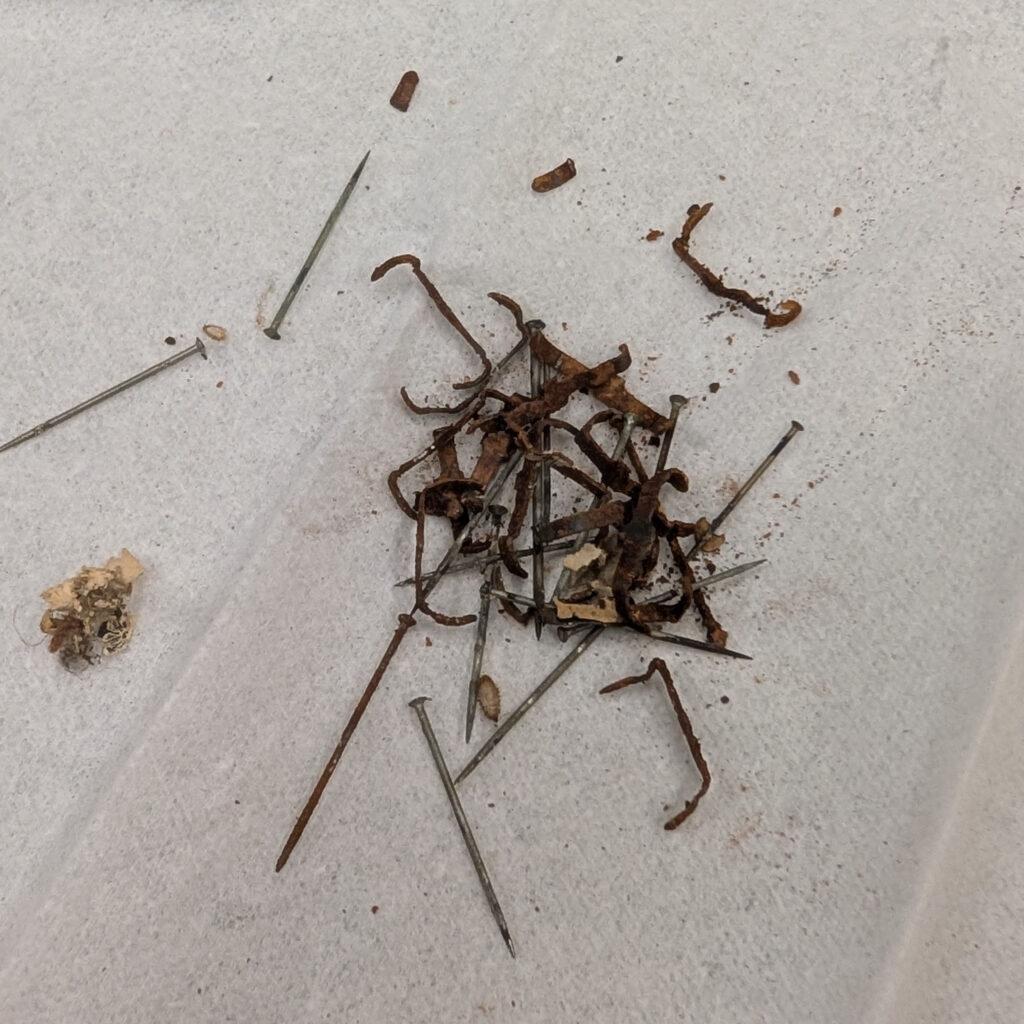
At the beginning of your archiving process, inspect the containers and the objects within: are there signs of water damage or mold? Did pests get into the containers and feast on the papers? Are there any rusty metal staples or pins sticking out of the papers that could hurt your hands? (There were plenty of those in the Collyer collection). As for the safety of the collection, check if any paper is brittle or crumbling, if photos are falling out of an album, or any other signs of instability. I highly recommend photographing the process at various stages to document if the papers or photographs are deteriorating.
Assess any potential threats to your health and safety and separate the “problem items” from the rest. If an item is moldy or too damaged to recover, you will have to make the tough decision to let it go. In the case of the Collyer Collection, a few items were set aside for destruction because their condition was too poor to recover any useful information: some were severely water damaged, others had been partially eaten by rodents.
Step 3: Survey and/or Inventory
Once you feel comfortable with the information you gathered and you have a safe and clean environment around you, it’s time to make a list of what you’ve got. I like to compile my surveys and inventories on a spreadsheet, which allows me to reorganize each folder or item by date or alphabetically with a simple click. However, there is nothing wrong with using a Word document, the Notes app on your phone, or even the lowest-tech option: pen and paper.
There is a spectrum of options for how to go about it, from the most general to the most detailed. Borrowing from Christine Miserandino’s spoon theory[2]Spoon theory is a simple metaphor created by Christine Miserandino, a blogger living with lupus, to explain what it’s like to live with limited energy. In her writing, she uses spoons to represent … Continue reading, I’m going to provide some options based on your time and energy availability. For the Collyer Collection, I started with the overall picture, then got more specific with each round, but you don’t need to: if making a list of the general contents of each box is enough for you, it’s already a great place to be.
Low Spoons: General Survey
If you have little time and/or energy, maybe you just want to make a note of the quantity, type, and location of the archival materials. This can be more than enough to feel more intellectual control over the situation.
Example: The Moses Collyer Collection consists of 17 boxes containing photographs, letters, receipts, and bound items. They are located in collection storage on three shelves.
Medium Spoons: Box-Level Container List
This is where making a list starts coming in handy. Take a sharpie and assign a number to each box or container; then, start opening them one by one and write a one-line description for each of them. It could be helpful to add a quick note about their conditions.
With this list of boxes and their general contents, you will be able to decide where you want to start based on what you care about the most, what is at the biggest risk of deterioration, or just what would be easiest to start with.
Example:
Box 1: 89 photographs, some correspondence. Good condition
Box 2: 10 folders of personal and business correspondence and business receipts, dated 1892–1908. Good condition.
Box 3: “Quotations” binder and papers within. Water damage but no mold.
Box 4: Four folders of business documents from 1911. Rusty paperclips and staples.
High Spoons: Folder or Item-Level Inventory
If you are feeling really ambitious and want to dedicate more time to an in-depth inventory, a folder-level or item-level list is for you. In my case, I already had folders with titles prepared by the archivists before me, but you could decide to list each item (or stack of items) and their approximate dates. Having a container list like this will be incredibly helpful to understand the extent of your archival materials, to locate each of them quickly, and to make a priority list of what you would like to properly rehouse—and even digitize!
Example:
Box 2:
Folders:
1. Collyer – Personal Correspondence, 1892–1893
2. Collyer – Personal Correspondence, 1894–1895
3. Collyer – Personal Correspondence, 1896–1898
4. Collyer – Personal Correspondence, 1899–1900
5. Collyer – Personal Correspondence, misc. undated
6. Business Receipts miscellaneous and 1895 and 1899
7. Business Receipts, 1900 and 1908
8. Business Receipts, 1909 and 1906
9. Business Correspondence, 1892–1899
10. Business Correspondence, 1900–1906
Step 4: Organizing and Light Preservation Tasks
As you can see from my first round of inventorying, some of the groupings of materials don’t make much sense: why are these business receipts separated by date, but not organized chronologically between the folders? This was the case with receipts, wage documentation, and correspondence in the Collyer Collection. I realized that, in this unorganized state, a researcher would have struggled finding what they were looking for. So, I started making piles. First by year, then by month. This way, I got a visual idea of how many papers were available for each period of time and I created new piles to reflect the newly-found chronological order.
As I was organizing the correspondence and papers, I also performed some light preservation tasks:
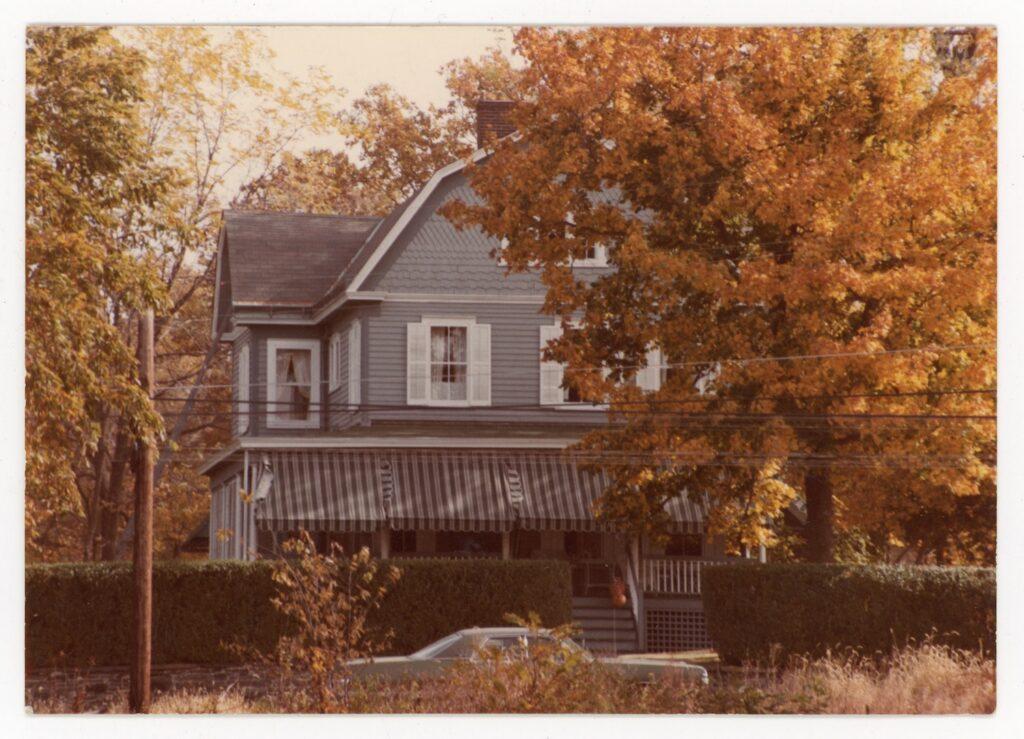
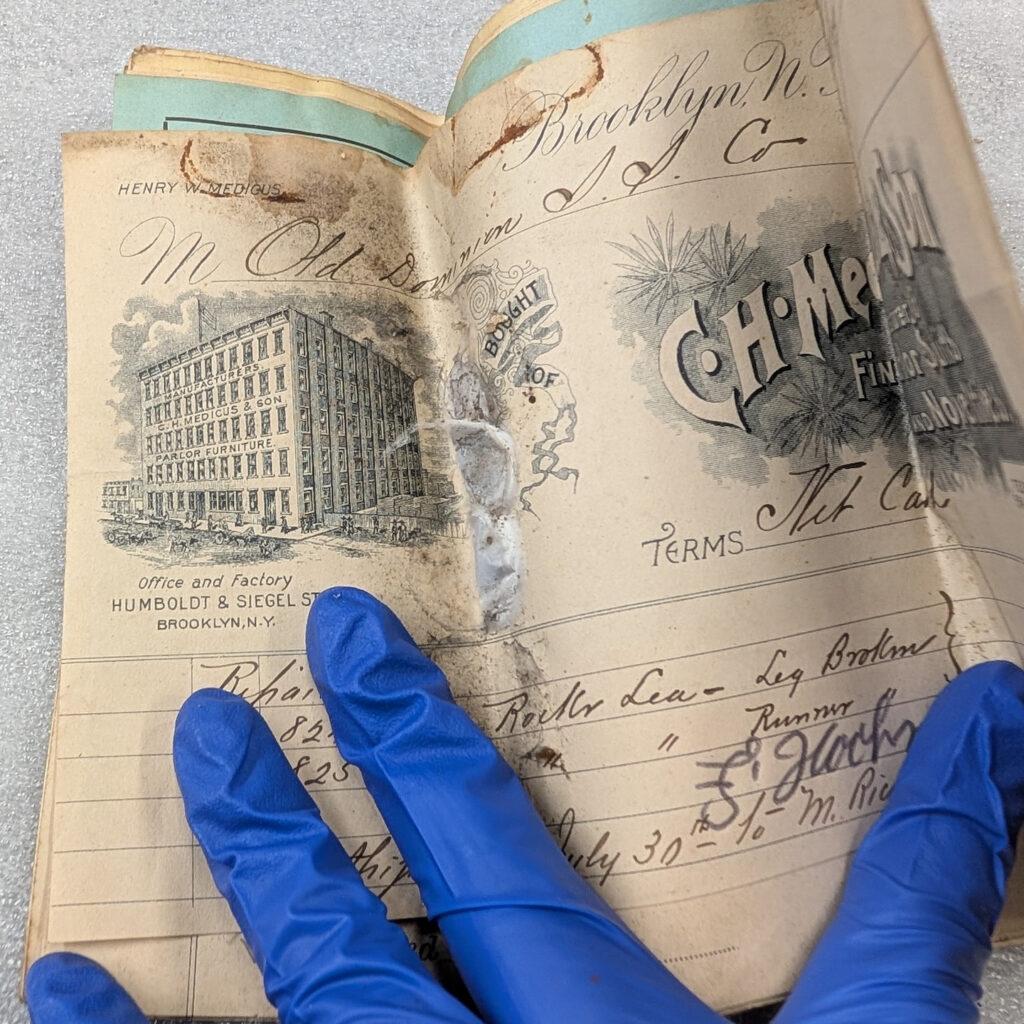
Unfolding papers: when possible, unfolding the paper minimizes creases and allows you to handle or scan the document without opening and closing it multiple times, which can cause stress along the fold lines. If the paper is too damaged or brittle, better leave it as it is to prevent it from tearing or cracking.
Removing fasteners (pins, staples, paperclips), especially if rusty. Metal fasteners and rubber bands degrade over time and can stain or tear the paper. To remove metal fasteners, use a dedicated metal spatula. In the unfortunate case that the papers are held together by glue or adhesive tape, do not try to tear the pages apart: you risk ripping the paper! To keep formerly-fastened items together, you can use acid-free plastic paper clips or place them between two sheets of acid-free paper.
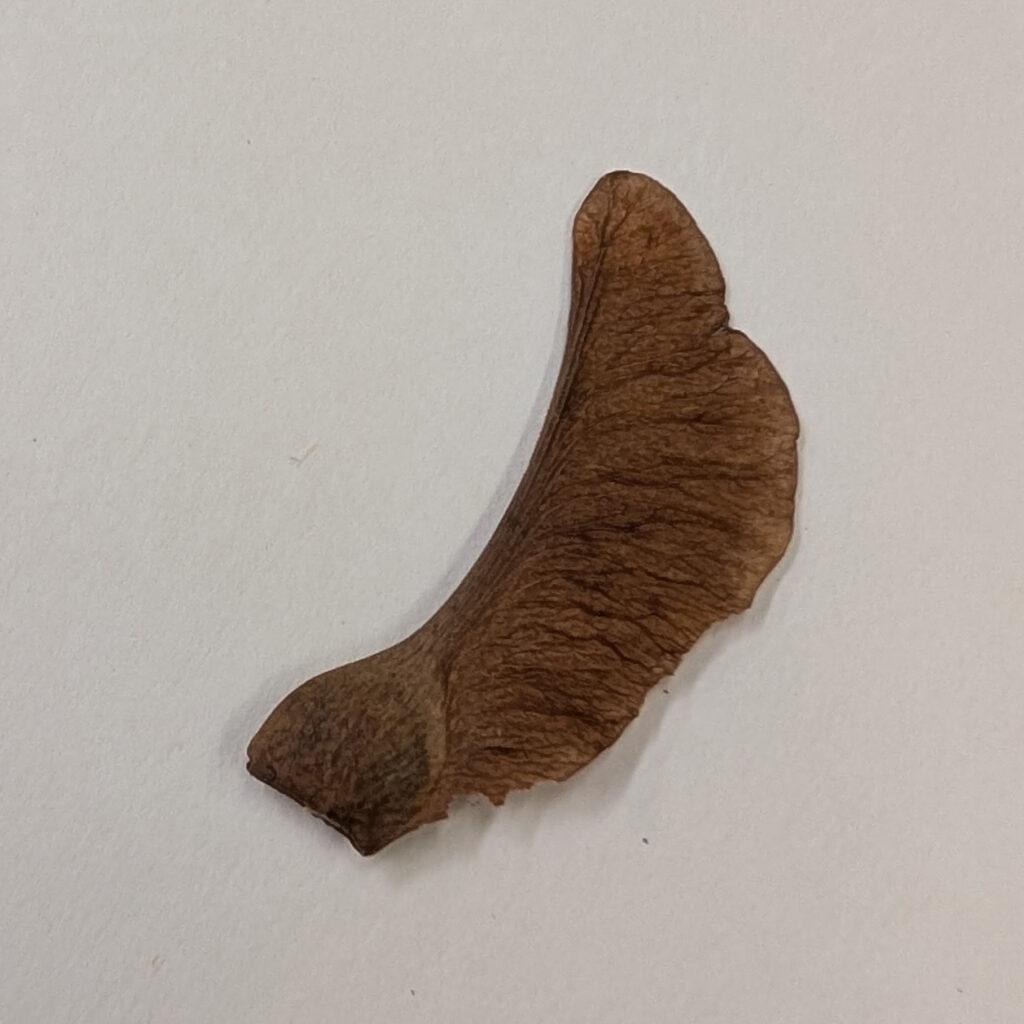
Removing the residue of pest damage: as I was inventorying the Collyer papers, I found spiderwebs, debris, dead bugs, and even a dried leaf. You can just remove those by hand (with gloves, of course!) and toss them. If spiderwebs are stuck to the paper, try gently dabbing them with a tissue until the residue comes off.
Step 5: Rehousing
For rehousing supplies, I highly recommend nation-wide supplier Gaylord Archival or Talas, a Brooklyn-based business. Acid-free boxes and folders are a little pricey, so again you can start with the basics, and then make upgrades. See it as a little TLC for your archival collection.
With regards to paper-based archival materials, the main concern is preventing exposure to light sources, which causes discoloration. You want to place letters and documents inside a box where they are not pressed too tight nor shuffled around too much, which could damage brittle paper. There are many box options, but here are the ones I recommend:
- Classic Record Storage Carton with Handholds: the main advantage of this box is that it’s big and easy to lift and carry, thanks to the handles. You can also stack multiple boxes, though I’d say no more than three or four to prevent squishing.
- Flip-Top Document Case: this case is perfect for smaller groups of documents or for papers that are more fragile, to prevent shuffling them around. They come in multiple sizes, but I’m partial to a legal-folder size.
- Barrier Board Photo and Print Box: this shoebox-style container is perfect for photographs, negatives, postcards, or smaller papers.
If you want to move to the next step of organizing your family memories, you can divide them into acid-free folders (either legal and letter-sized). For smaller items, I would get acid-free envelopes, which will also fit neatly into the acid-free “shoebox.”
If I had limited resources, my first concern would be stabilizing photographic prints and negatives: these are made with chemical processes, so there is a high chance that they will deteriorate over time.
When plastic and chemicals degrade, they create gases that damage all surrounding materials by “burning” them and turning them yellow and faded.
So, my first course of action would be to buy an acid-free box and some acid-free folders or envelopes to separate each photograph or negative, then use a pencil to annotate the subject and the date of the image.
If you are feeling really fancy, some mylar sleeves are a good option to protect photographs and be able to admire them through the acid-free transparent film.
Do not use them for negatives, though: film does not like the static that gets created between layers of mylar.
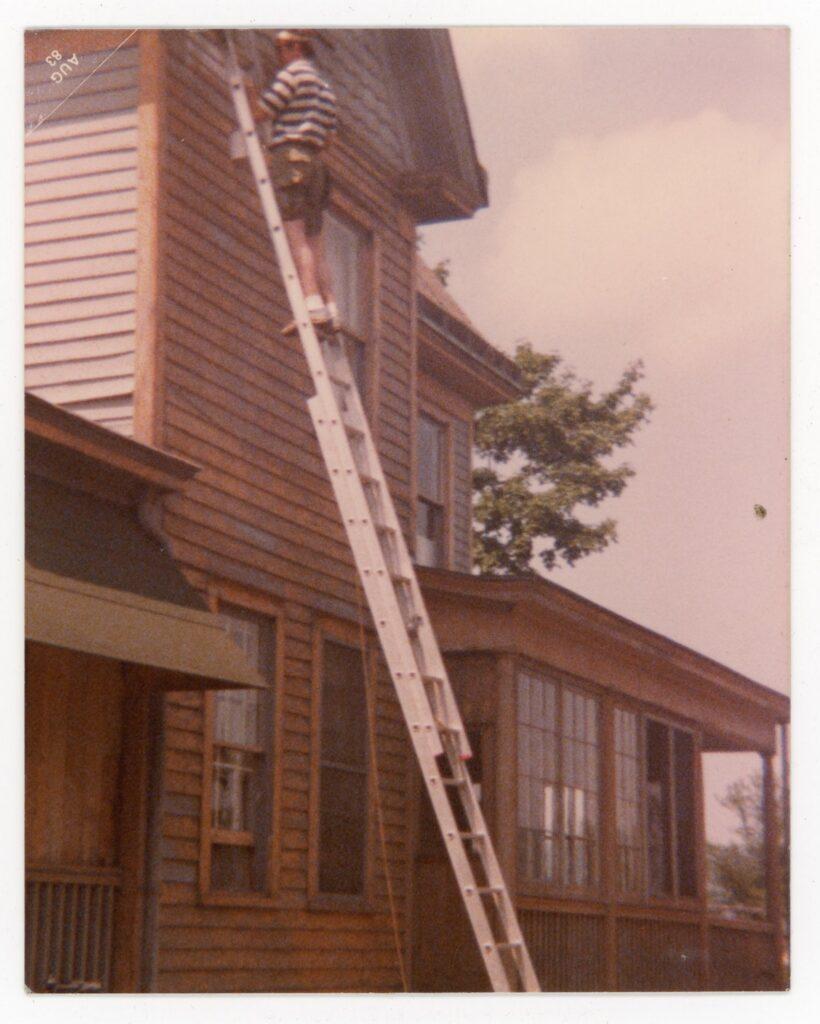
An example of a photograph showing color degradation.
[Man painting the facade of Captain Moses Collyer House], August 1983. Gift of Diane and Joseph Perillo 2010.003.0088
For the Moses Collyer Collection, each type of item had slightly different housing requirements. Photographs had been stored vertically in an acid-free box that was too big for them: they were already a little warped and worn on the edges and corners, and the shuffling was only making it worse. As I digitized them, I rehoused them in acid-free folders to be stored more tightly in a document box, with an indication of their inventory number written in pencil. As for the papers, I condensed the items into fewer boxes to prevent shuffling, rehoused the most fragile ones in mylar sleeves, and replaced the rusty fasteners with acid-free plastic paperclips. Finally, the volumes were enclosed in custom-made phase boxes to keep them from falling apart.
Step 6: Enjoy the Fruits of Your Labor!
Take a step back and admire your work! You have significantly improved the storage conditions of your family memories, and they will last a very long time. What you can do with them is endless, but here are some ideas:
Have a Show-and-Tell Night
Invite your friends and family and share your progress with them! Provide nitrile gloves (and keep drinks and snacks away from the collection) and let your community marvel at the photographs, letters, and old books you have saved from decay.
Record an Oral History Interview
This would be a good project to tie in with the Show and Tell: as your relatives and friends are going through the collection, seeing old photographs is probably going to jog their memory! Be ready with the voice recording app on your phone to save their thoughts and comments for posterity. You can even prepare a few questions beforehand, especially if you need help dating a photograph or identifying who is in a picture.
Transcribe Handwritten Documents
Another fun project you can start with your family is meeting up to transcribe some old letters and documents. Gather around a table with your archival documents and grab a laptop or a tablet, and transcribe away. Who knows, maybe you will find some century-old family gossip! At the South Street Seaport Museum, the Archives Program Volunteers have been transcribing Moses Collyer’s correspondence, unveiling some long-forgotten messages between the members of a tightly-knit family. Here is an example of a letter to Moses Collyer from his mother Mary Ann dated March 12, 1893:
Letter to Moses W. Collyer from his mother, March 12, 1893. In Personal correspondence, 1892–1893. Gift of Diane and Joseph Perillo 2010.003.0106.A-.J.
Digitize
Scanning the photographs and papers you have organized can be a way to preserve their current appearance and to access them without having to touch them every time, which could put a strain on their condition. It is also the easiest way to share these memories with other family members. If you have a scanner, you can digitize the materials yourself—and maybe make it another family group project. Otherwise, there are many companies you can outsource the digitization to: if you are in New York, I recommend Dijifi for photographs and audiovisual materials.
Create Art
When it comes to what you can do with your family memories, why limit your creativity? Michelle de Celia, a Brazilian and American artist based in Worcester, Massachusetts, used an old family photograph as a starting point for her 2023 project Dona Lucia e suas Duas Filhas. By printing and re-printing the same photograph in different colors, cutting it up, putting it back together, and adorning it in colorful paper, rhinestones, and other found materials, Michelle reflected on how memories, especially when tied to the women in her family, evolve and gain new meaning over time.
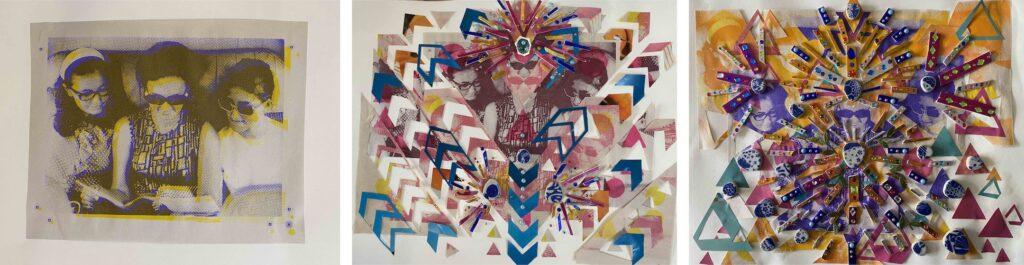
“Dona Lucia e Suas Duas Filhas is a series made from screen prints of a photograph of my grandmother, my mother, and my aunt—an image I have long been drawn to. This project dwells within that inheritance, tracing their beauty and suffering, their union and separation. It becomes a meditation on lineage: how pain is carried, transformed, and, at times, resisted. At its core, the work reflects my own impulse to move beyond that suffering—to gather the fragments and search for something luminous within them.”
Additional Readings and Resources
Library of Congress (LOC) Conservation Division, Collections Care: www.loc.gov/preservation/care
National Archives and Records Administration (NARA) Preservation Department: www.archives.gov/preservation
“Mould in archive collections”, National Archives, Kew, London. www.nationalarchives.gov.uk/archives-sector/advice-and-guidance/managing-your-collection/mould-in-archive-collections
References
| ↑1 | Lighterage (or lightering) is the maritime process of transferring cargo, such as oil, bulk commodities, or containers, between a large vessel (mother vessel) and a smaller vessel (lighter or barge). Lightering can also refer to the use of a lighter barge for any form of short-distance transport, such as to bring railroad cars across a river. |
|---|---|
| ↑2 | Spoon theory is a simple metaphor created by Christine Miserandino, a blogger living with lupus, to explain what it’s like to live with limited energy. In her writing, she uses spoons to represent units of energy. The thought process is you only have a limited number of spoons each day. “Spoon Theory: A New Way to Think About Your Daily Energy”, National Center on Health, Physical Activity and Disability. https://www.nchpad.org/resources/spoon-theory-a-new-way-to-think-about-your-daily-energy/ “The Spoon Theory”, by Christine Miserandino, Butyoudontlooksick.com, 2003. https://web.archive.org/web/20191117210039/https://butyoudontlooksick.com/articles/written-by-christine/the-spoon-theory/ |